If you're thinking about a new terracotta pot or vase and have no idea how to go about it, Art Supplies got you covered. In the following article, we'll look at each of the seven steps to painting terracotta pots. We'll cover what material to use (such as terracotta), what tools you'll need to use (pens, brushes and paintbrushes), and finally, what finishing methods, you can use on your new creations. After reading this article, you should know how to go about building your DIY art gallery and also be able to show off your new porcelain pots to your friends and family!
What are Terracotta Pots?
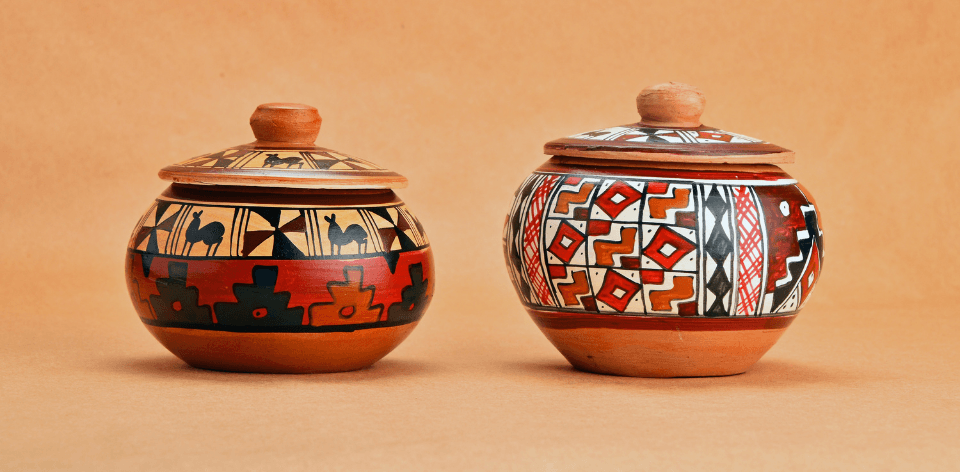
Terracotta pots are vessels that are used to hold various goods. They are usually painted in a variety of colours and patterns. They can be used as vases, planters or even small fish bowls. In this step-by-step guide, we will show you how to paint terracotta pots with acrylic paints so that they look beautiful!
1st Step: Select the correct colours for your project.
The first thing you'll need to do is to select the correct colours for your project. When it comes to painting terracotta, we recommend using light pastel colours such as blue, green and yellow. It is the texture of the colours and their intensity that will give your terracotta item personality. If you find your colour choices are a bit overwhelming, then you can always go back to your original plan. For instance, if you were going to paint a terracotta plant, you could go back to using light green instead of a lighter shade of green for the paint.
2nd Step: Prepare the surface on which you're going to paint.
Next up, you'll need to prepare the surface on which you're going to paint. This could involve some scrubbing depending on the severity of the terracotta problem. But generally, you'll need to clean the terracotta with a detergent and water so that nothing gets left behind. The next step would be to get your brushes ready. Make sure that your brushes are in good shape because you'll need to carefully shape the painting on the terracotta pot.
3rd Step: Cleaned your chosen surface.
Now that you have your brushes ready, you should have already cleaned the surface thoroughly. You can use a mixture of half water and half terracotta paint for this part of the painting. However, keep in mind that you should never use too much colour, or you'll end up not being able to make the picture stick to the terracotta. Just use enough paint and let it dry so that you can apply the final coat.
4th Step: Remove all the soil.
After you have all your brushes ready, you should be good and ready to start painting. First, you'll need to remove the soil from the bottom of the terracotta pot. Use a toothbrush or a wire brush to do this so that you'll be able to remove all the soil easily. You will need to do this because it will be tough for the paint to stick if you don't remove all the soil. After removing the soil, you can now begin working on the lighter portions of the picture.
5th Step: Fill the bottom of the terracotta pot with a light colour of paint.
The next step would be to fill the bottom of the terracotta pot with a light paint colour. Make sure that the colour you choose is lighter than the surrounding one. It would be best if you did this because lighter colours will stand out better against the terracotta. The last step would be to let the paint dry for a few hours. It would be best to wait until it becomes dry so that it won't cause you any hassle when you open the pot.
6th Step: Wipe it with a damp cloth.
Once you're done painting, you can now wipe it with a damp cloth. This is a crucial step because there will be streaks all over your terracotta artwork if you don't do this. Another thing that you need to remember when painting is to be patient. Painting terracotta is very time consuming, but it's also an enriching task. So if you're interested in doing this, follow these steps, and you should have no problems at all.
What are the tools needed in painting terracotta pots?
- Paint
- Brushes
- Oils
- Paints thinner and mediums
- Wide palette knife for blending paints
- Scraper for removing excess paint
- Sandpaper to smooth clay after painting step
5 tips in painting terracotta pots:
1. The best way to clean terracotta is with a scrub brush and soap
2. Paint dry time will vary, but you can recoat in just 15 minutes for up to 3 additional layers
3. Be patient when applying your paint, don't scrape or drag it on the pot
4. You can seal your pot with any clear protective coating for durability and protection from spills and dirt; we recommend polyurethane varnish because it dries quickly and has no odour or fumes
5. Apply at least 4 coats of paint total for complete coverage and protection of your pot.

